Introduction
The MP02 4K media player impresses with its brilliant 4K HDR video output, network connections, multiple control options and the ability to synchronise multiple players during operation.
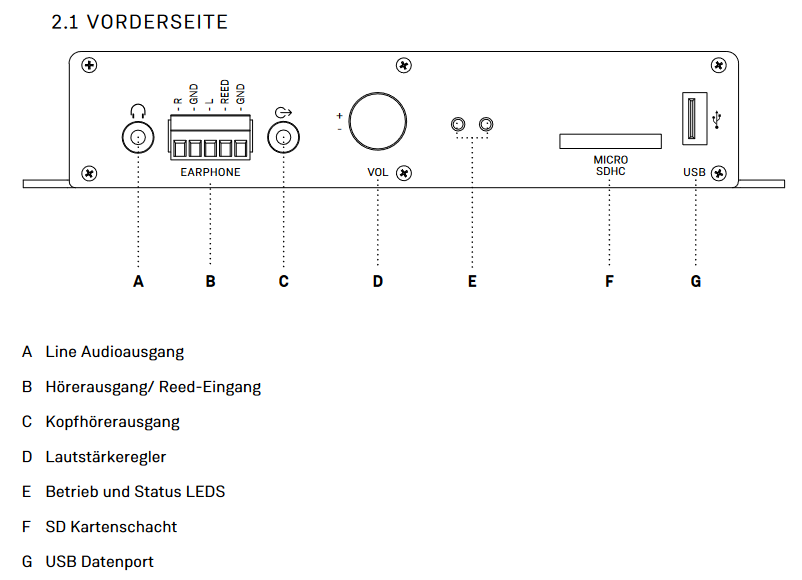
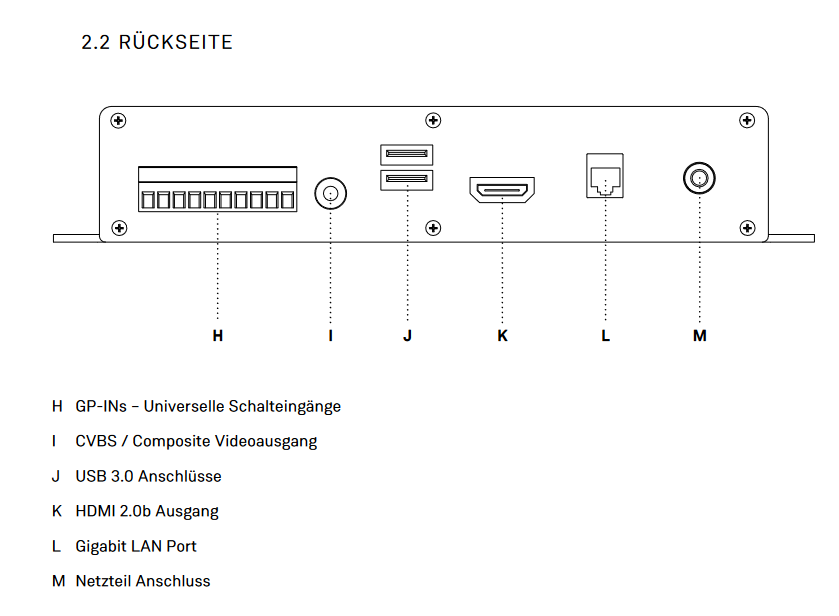
NOTE: Our flyer for the MP02 4K contains two errors. The labeling in the “Technical Data” view on the back should read “HDMI OUT” instead of “HDMI IN.” The labeling for the front panel interfaces is as shown here, not as depicted in the flyer. In our MP02 4K manual (also available for download), all views and information are shown correctly.
Programming
Simple touch menu
In order to define the touch points the coordinations of the surface on the screen
that will be act like a touch button has to be defined.
4 values need to be defined.
X axis, Y axis, Width, Hight
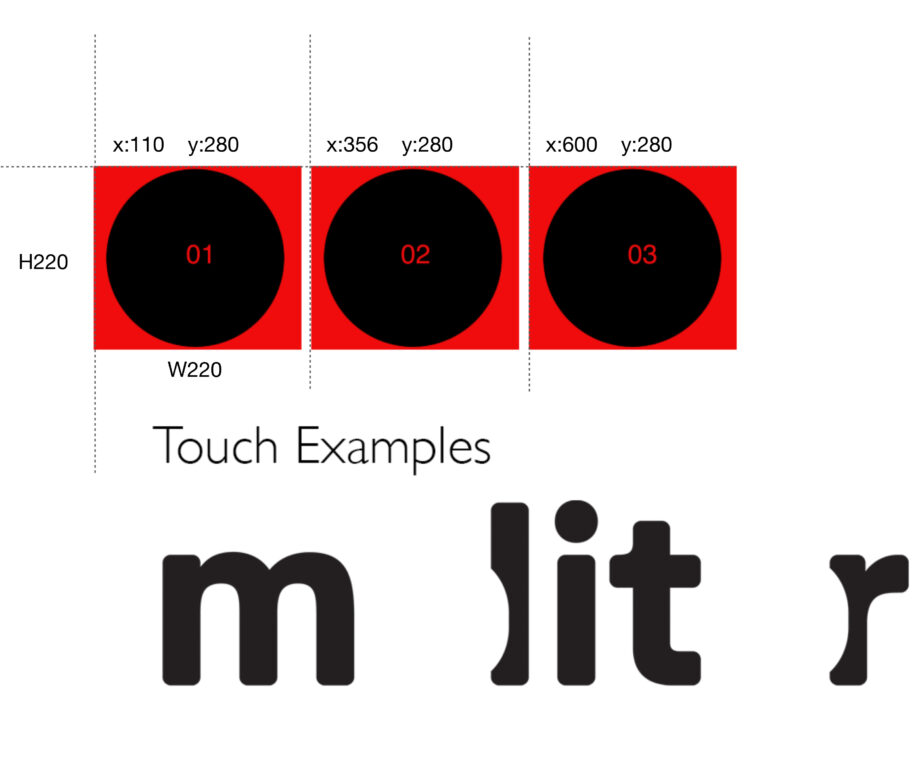
[ITEM 0]
Datei=menu_touch.png
Displaytime=30 // this shows how long the image will stay (30 sec) until move to the next ITEM
T110, 280, 220, 220, 1=PLAY 20
T356, 280, 220, 220, 1=PLAY 21
T600, 280, 220, 220, 1=PLAY 22
Succ=0
[ITEM 20]
Datei=1.mp4
Succ=0
[ITEM 21]
Datei=2.mp4
Succ=0
[ITEM 22]
Datei=3.mp4
Succ=0
Connect via Network
Both MP04 NS 4K LIGHT player can connect to a network via RJ45 Cat-6 Ethernet Patch Cable.
They can connect to a local network, to an FTP server and internet.
Also most of the times when
the player is mounted to a location where is hard to reach it can connect via RJ45 Cable
to a computer/notebook and access the menu and execute remote commands.
In case the player gets an ip is automatic, or the network settings makes it hard to connect, simply you can reset the connection, deactivate the DCHP option and give a static ip
where you connect.
First just run this script with the filename as “CFPSetup.txt” to the player by copying it to an sd card
DHCP Aus
IP 192.168.0.2
Subnet 255.255.255.0
Gateway 192.168.0.2
DNS 192.168.0.2
UDP Port 4950
and then simply connect with RJ45 Cat-6 Ethernet Patch Cable and via a browser type the ip (in this case 192.168.0.2 ) and the menu of the player will be accessible via a computer.
Synchronised multiple players
Multiple molitor MP02 4K players can be synchronised via network to create multi display projects, or video walls.
There is one master player that controls the slave players. If you want some interactivity, or audio into the video wall, it has to be added to the master player and the slave players will follow.
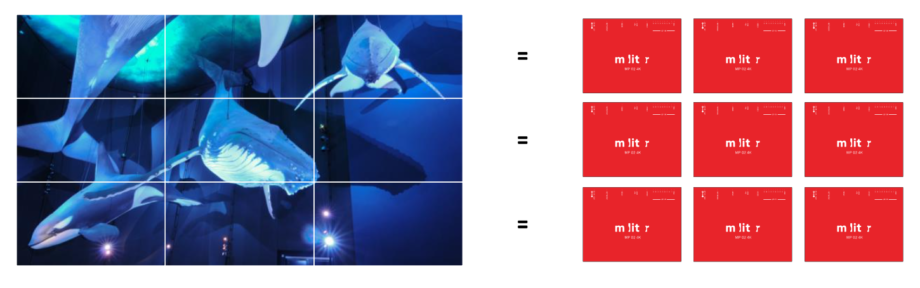
In order to create a synch group all players must be in the same local network and use the same UDP port. Every player must have a unique ip address.
Some settings that need to taken in advance for the synch to work accurate are:
Synchron Genauigkeit Hoch
In order to give customised ip addresses must the DHCP to be off and manually type the ip address for all the players.
Gateway address to be the same with the ip of the master player.
Also the Gateway address of the slave players should be the same as the Gateway address of the master
For example the settings of the Master player looks like this:
Synchronisierung An
Synchron Master
Synchron Genauigkeit Hoch
Synchrongruppe 1
DHCP Aus
IP 192.168.3.31
Subnetz 255.255.255.0
Gateway 192.168.3.31
DNS 192.168.3.31
UDP Port 4950
and for the slave
Synchronisierung An
Synchron Slave
Synchron Genauigkeit Hoch
Synchrongruppe 1
DHCP Aus
IP 192.168.3.32
Subnetz 255.255.255.0
Gateway 192.168.3.31
DNS 192.168.3.31
UDP Port 4950
and more players can be added to the group with the same settings, just with a different ip
IP 192.168.3.33
IP 192.168.3.34
….
And the playlists for a simple autostart synch group which looping
for the master player
[ITEM 0]
Datei=s1.mp4
Loop=-1
and for the slave player
[ITEM 0]
Datei=s1_b.mp4
Loop=-1
Concerning the video content its important:
Videos must have
- exact same duration.
- exact same frame rate.
- Same if possible bitrate.